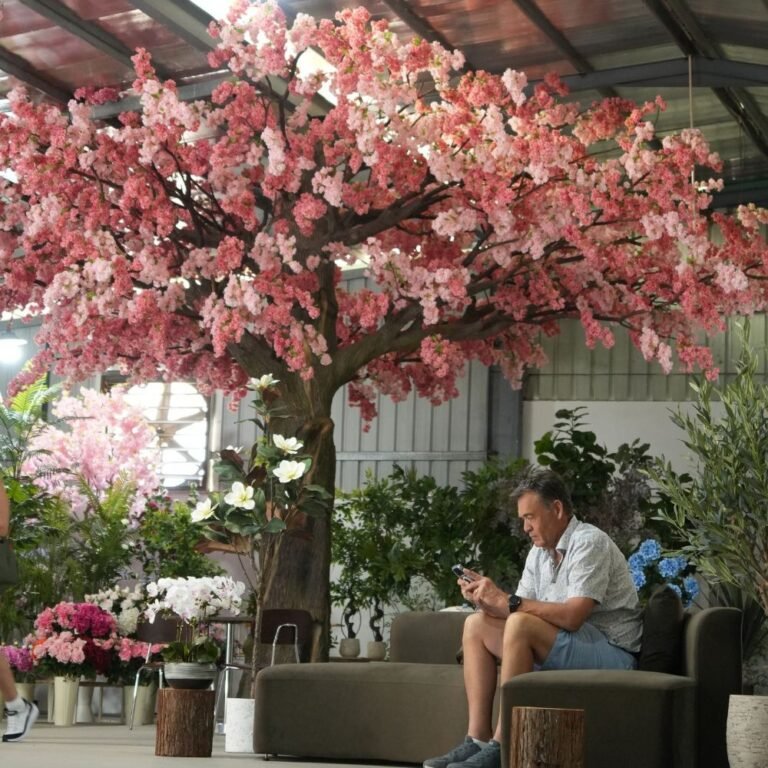
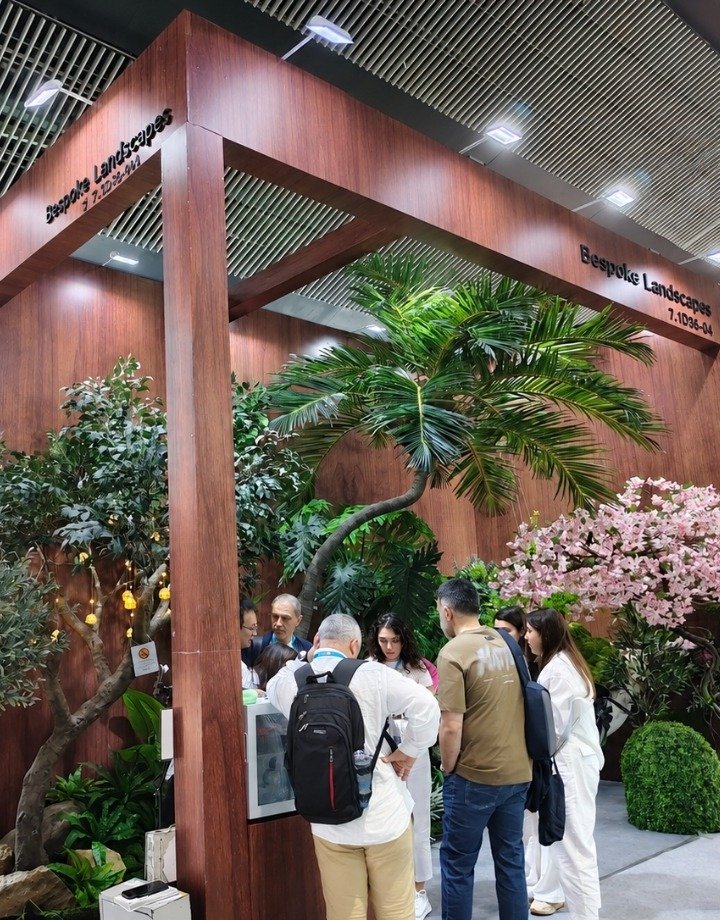
I often see columns interrupt an interior design. Hiding them can leave an awkward feature. At Oakco, we used one as the starting point for a cherry blossom tree.
We built a custom artificial cherry blossom tree around an existing showroom column. Our process combined a welded steel framework, wire mesh, two cement coats, hand-shaped bark, repeated colour adjustments, and inserted branches arranged to create a fuller blossom canopy.
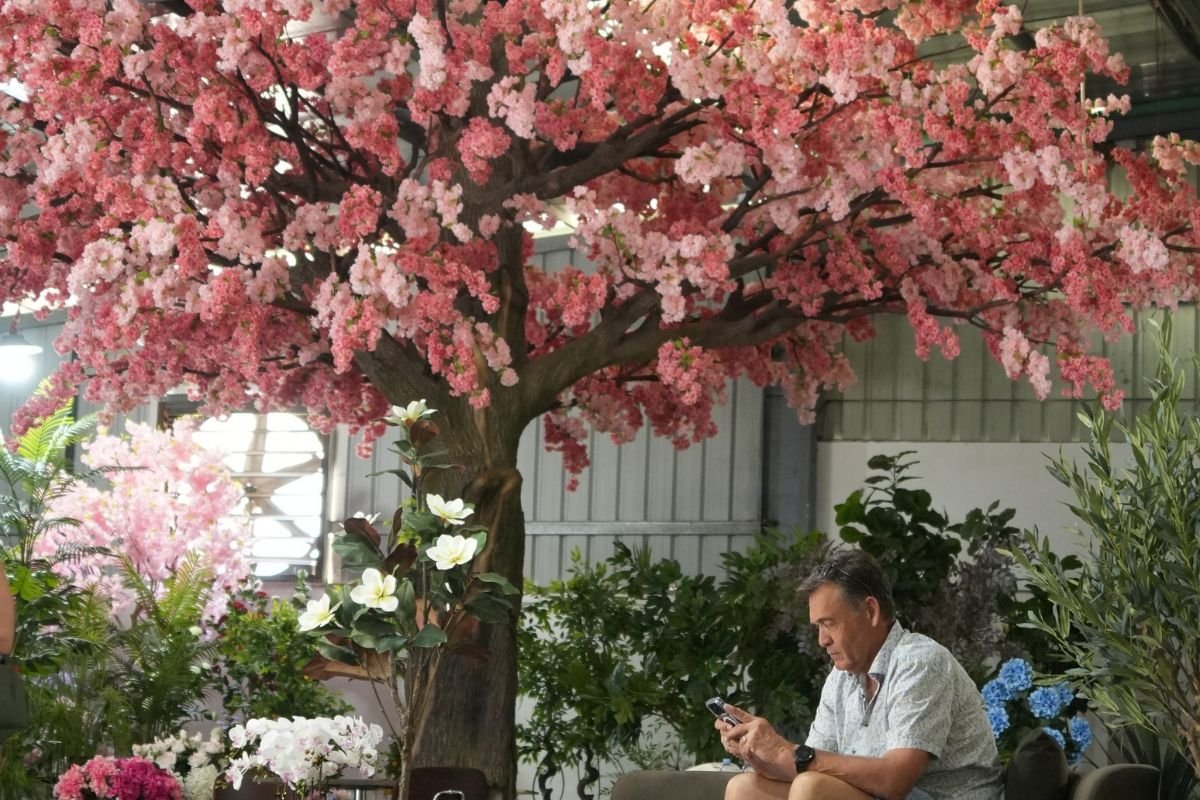
I want to share how we made this tree because a finished photograph only shows part of our work. The bark, branch connections, colour changes, and canopy width all came from separate decisions during production.
This project took place in our showroom. We could review the tree in its actual setting as we worked. I will walk through the process, from the framework around the column to the final arrangement of the cherry blossom branches.
Designing Around the Column and Building the Steel Framework
I cannot ignore a column’s position when planning a tree. A poorly matched trunk can look bulky, and misplaced branches can make the whole tree feel unbalanced.
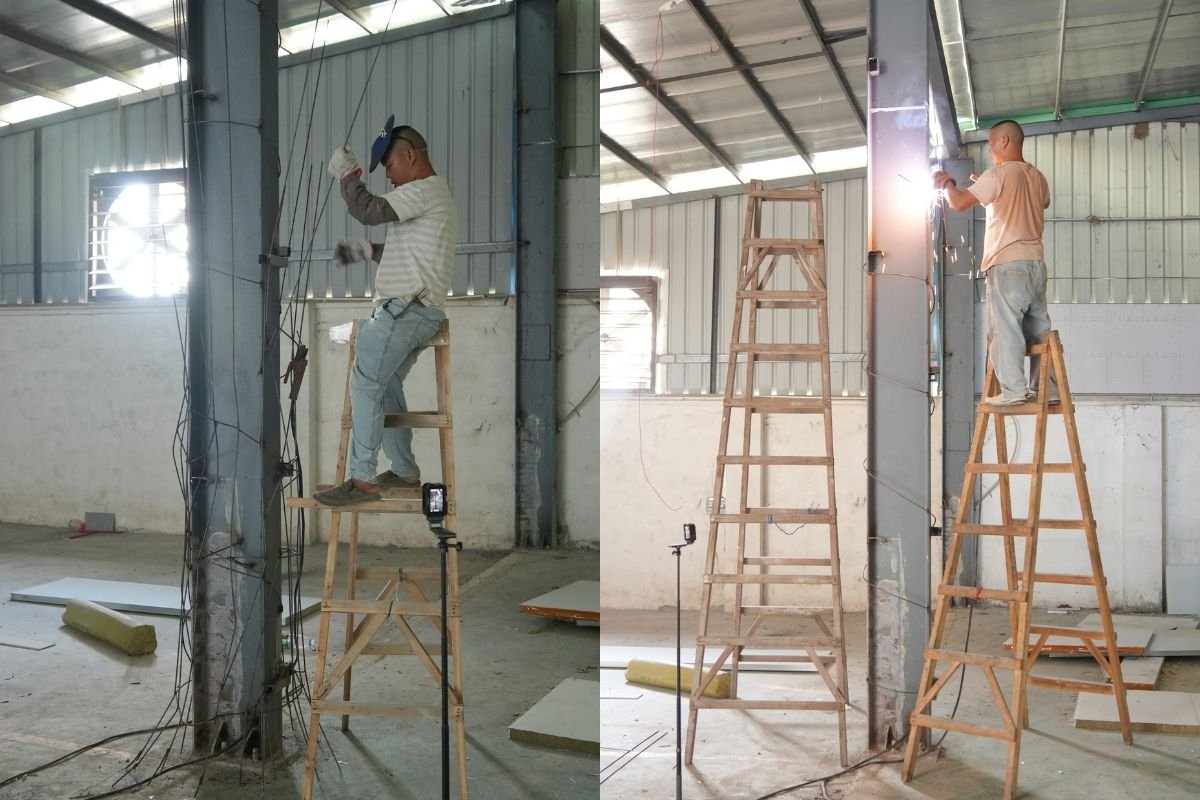
We used the existing column as the starting point for our tree design. We built a welded reinforcing-steel framework around it to establish the trunk profile, wider base, and main branch directions before adding wire mesh and cement.
I start with the space around the tree
I first consider how the tree will sit within the room. The column fixes its position, but we can still shape the trunk outline and the branches around it.
I look at the available floor space, ceiling height, and main viewing directions. I also consider where people will walk and where furniture may sit. These details help me discuss a useful tree shape with a project team.
For a hotel or restaurant project, I would ask for site photographs, column dimensions, and a layout drawing. I would also ask about the preferred canopy width. A reference image helps us understand the visual direction, but it does not replace measurements.
We build the main form before adding surface detail
We shaped and welded reinforcing bars around the showroom column. This framework established the outline that our cement work would follow.
I pay attention to the relationship between the trunk and its main branches. A large trunk with thin, evenly spaced branches can look disconnected. We need branch sizes and directions that work with the trunk’s overall volume.
I also look for variation. We can change the height of branch junctions, adjust their angles, and widen the base. These choices help us move away from the straight outline of the original column.
| Design point | What we review | Why I review it |
|---|---|---|
| Trunk profile | We review the outline around the column. | I want the trunk to fit the space without unnecessary bulk. |
| Base shape | We review how the trunk widens near the floor. | I want a natural transition into the surrounding setting. |
| Main branches | We review their height, size, and direction. | I want the future canopy to have a clear supporting form. |
| Viewing angles | We review the tree from different positions. | I want the shape to work beyond one photograph. |
I treat this framework as the beginning of the sculpture. We can refine the surface later, but the main proportions need attention at this early stage.
Applying Cement and Sculpting Realistic Bark Texture
I know that brown paint cannot hide a flat trunk. Without depth in the surface, a large artificial tree can still look like a covered column.
We fitted wire mesh over the steel framework and applied a first cement coat to build the tree’s body. We used a second coat to refine its shape and pressed a small bark-texture mould into the surface to create tree grain.
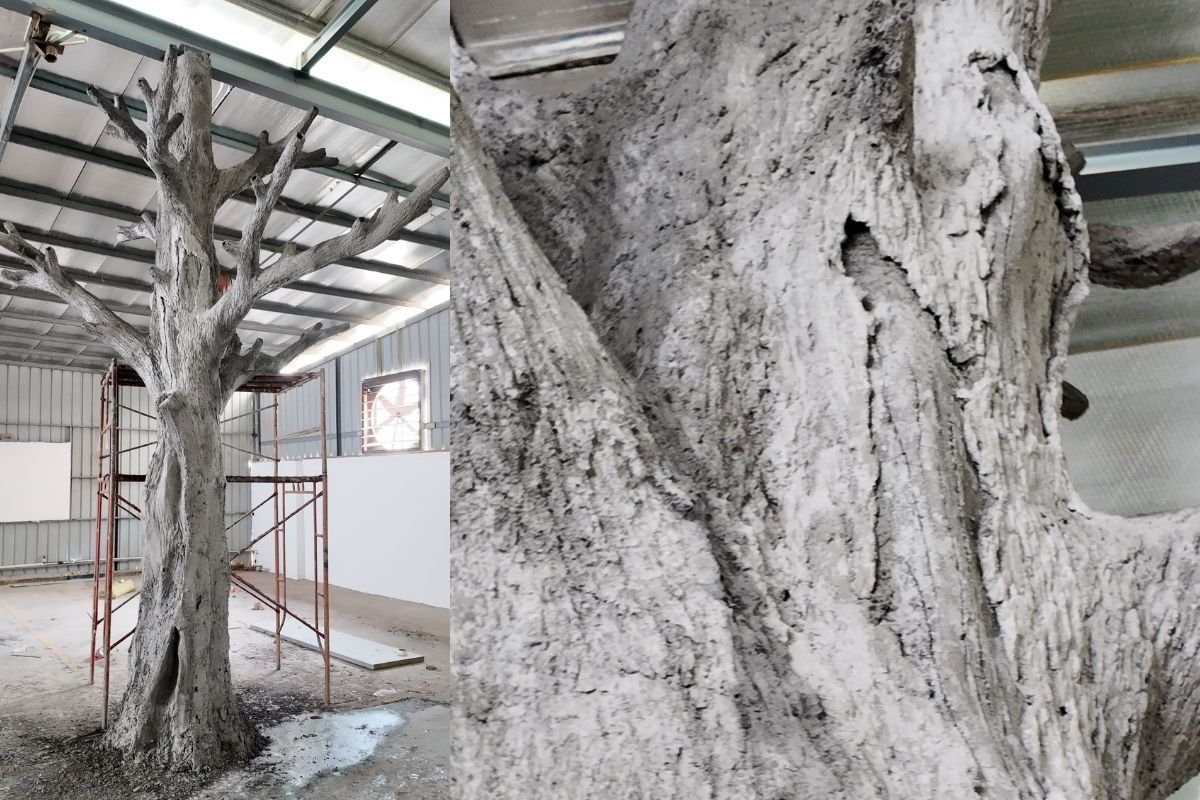
We use wire mesh as the backing for cement
We fitted steel wire mesh over the framework before applying cement. The mesh bridged the spaces between the reinforcing bars and gave us a backing for the next stage.
I see this step as the connection between the open framework and the solid-looking tree form. We followed the trunk outline and the main branches with the mesh so that the cement application could develop the intended shape.
Our photographs show different points in this work. Some show the exposed framework. Others show the completed cement surface. We do not have a separate photograph of every application stage, but the sequence explains how we moved between those visible results.
We give the two cement coats different jobs
We used the first coat to establish the outer body. We built up the trunk volume and formed the main transitions around the base and branch junctions.
We used the second coat for further shaping and surface detail. At this point, we could refine raised areas, grooves, and changes in the trunk’s outline.
I want those details to follow the larger form. Deep marks can look unnatural when they have no relationship to the trunk or branches. We need the texture and the shape to work together.
We work a small bark mould across the surface
We used a small piece of bark-texture mould to press grain into the workable cement. We repeated this process across the surface as we developed the bark.
I pay attention to the direction of the grain around curves and branch junctions. I also review how repeated impressions sit beside one another. A visible pattern can draw attention away from the tree’s shape.
| Process stage | What we do | What I look for |
|---|---|---|
| Wire mesh | We fit a backing over the framework. | I check how it follows the intended tree form. |
| First cement coat | We build the main outer body. | I review the trunk volume and major transitions. |
| Second cement coat | We refine the shape and surface. | I review the grooves, raised areas, and branch junctions. |
| Bark imprinting | We press a small mould into the surface. | I review the grain direction and repeated patterns. |
I like to review close-up photographs before colouring. They let me inspect the sculpting without the colour distracting from the surface itself.
Refining the Trunk with Layered Colour and Hand-Finished Details
I can lose the bark detail under one flat colour. A mismatched branch can also stand out, even when the trunk itself has been carefully sculpted.
We coloured the dried cement surface and adjusted the finish several times. We reviewed the bark’s raised areas, deeper grooves, and branch connections. We also made colour touch-ups after inserting branches to improve the overall visual match.
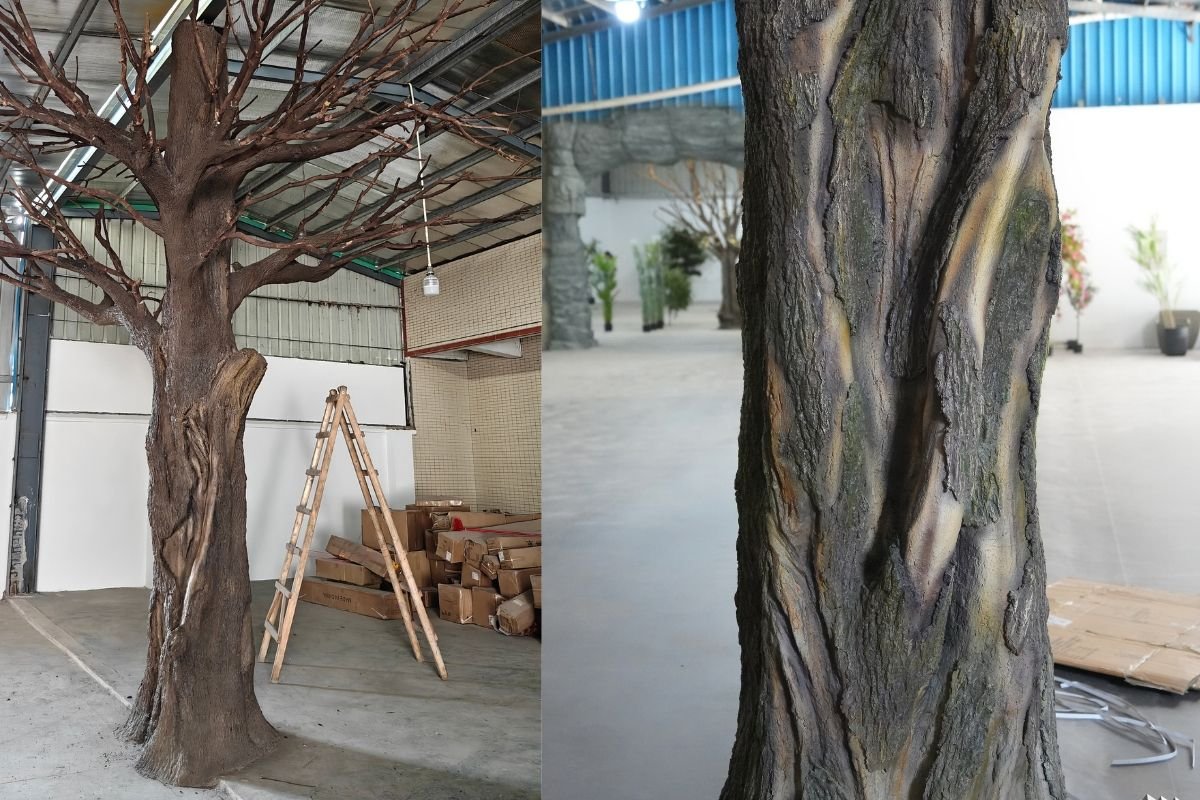
We review colour across the whole trunk
We began colouring after the cement had dried. I look at the entire trunk first because the main colour needs to work across a large surface.
I then look more closely at the bark relief. Our grooves and raised areas create physical depth. The colour needs to help those details remain visible.
I do not judge this work from a small colour sample alone. A colour that looks suitable on a sample can appear different across a full tree trunk. The room’s light and the surrounding materials also affect what we see.
For this showroom tree, we reviewed the finish through repeated adjustments. The photographs show the change from the unpainted cement surface to the coloured trunk.
We check the transition into inserted branches
I also review the points where the smaller branches meet the sculpted sections. These areas can reveal a difference in colour or finish.
We made further colour adjustments after branch insertion. This helped us review the components together rather than treating the trunk and branches as separate finished items.
Our photographs labelled before and after colour touch-ups show this part of the process. They show the bare branch arrangement and the trunk finish. They do not show the completed pink blossom canopy.
I use photographs to make feedback clearer
When I discuss a custom tree with a buyer, I find that specific photographs make the conversation easier. A full view helps us discuss the overall colour. A close view helps us discuss bark texture and connections.
I would ask a buyer to identify the area they want adjusted. This gives our team a clearer instruction than a general comment such as “make it more realistic.”
| Review image | What we can assess | How I use the feedback |
|---|---|---|
| Full trunk view | We can assess the overall colour balance. | I use it to discuss the main finish. |
| Bark close-up | We can assess grooves and raised details. | I use it to discuss local colour adjustments. |
| Branch connection | We can assess the match between components. | I use it to identify touch-up areas. |
| Wider room view | We can assess the tree in its surroundings. | I use it to discuss how the finish fits the setting. |
I keep the feedback tied to visible details so that our next adjustment has a clear purpose.
Installing Branches and Shaping a Full Cherry Blossom Canopy
I can finish a convincing trunk and still have an incomplete-looking tree. Gaps, narrow branch spread, or crowded blossoms can weaken the final shape.
We inserted the branches and adjusted their direction, spacing, and spread to develop a fuller crown. We reviewed the tree from different positions and arranged the cherry blossom canopy around the main branching form.
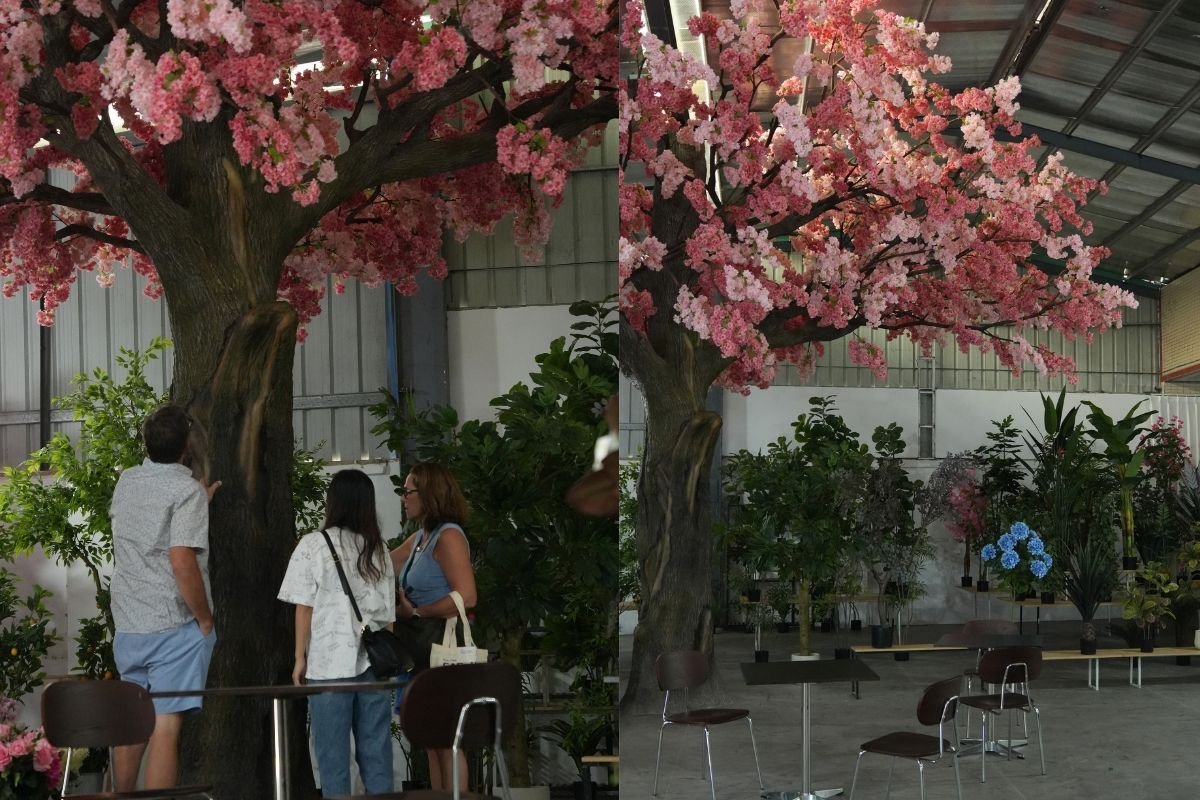
We use branch placement to develop canopy width
We inserted the branches into the tree and adjusted their arrangement as the crown developed. I look at their outward spread because this sets much of the canopy’s width.
I also look at the transition from the large sculpted branches to the smaller branches. A sudden change in direction can make the crown look detached from the trunk.
We adjusted the branches to give the tree a fuller appearance. I use “fuller” to describe the overall crown, including its width and distribution. I do not treat it as a reason to fill every visible gap with flowers.
I check fullness from several directions
I want to see the tree from the places where people will actually view it. One side may look full while another side shows a large empty area.
We can adjust the direction and spacing of branches to improve that balance. I also watch for areas where too many branches overlap. Heavy crowding can hide the structure and make the canopy look compressed.
For a commercial interior, I would discuss the preferred viewing sides with the project team. A tree beside a wall has different viewing needs from a tree in the middle of a lobby.
We review the blossom canopy with the trunk
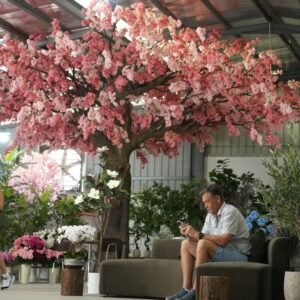
Our final photograph shows pink cherry blossoms extending across the branching form. I review this finished view together with the earlier trunk photographs.
The canopy needs to fit the trunk’s scale and direction. I also want enough of the sculpted work to remain visible so that the tree reads as one complete form.
| Canopy detail | What we adjust | What I want to achieve |
|---|---|---|
| Width | We adjust the outward branch spread. | I want the crown to fit the intended space. |
| Direction | We adjust how branches extend from the main form. | I want a connected appearance from trunk to canopy. |
| Density | We review sparse and crowded areas. | I want fullness with visible shape. |
| Viewing balance | We inspect the tree from different sides. | I want the arrangement to work from the main viewpoints. |
For a similar project, I would start with photographs, measurements, and the intended canopy width. Our custom artificial tree service gives project teams a starting point for that discussion.
I would also share our artificial cherry blossom tree options to help clarify the preferred flower colour and overall style.
Conclusion
We transformed a showroom column through steel fabrication, cement sculpting, colour refinement, and canopy shaping. I welcome your drawings and references to discuss a custom tree for your space.